Top 10 Best Shop Lights for Garages and Workshops

A garage can look bright from the doorway and still leave a dark patch across the workbench. That is where Shop Lights matter: they shape visibility, comfort, and how confidently you handle detailed tasks. The right fixture is not simply the one with the highest lumen number. Beam spread, mounting height, color quality, glare, and controls all affect the result.

Lighting researcher Dr. Mariana Figueiro’s work focuses on how light affects people. A practical paraphrase of that perspective is: “Choose lighting with the person and task in mind.” This is a paraphrase, not a verbatim quotation. For a home workshop, that means checking how light falls on a vise, tool wall, or engine bay—not just reading the box. Small details count.

This guide compares ten Shop Lights for garages and workshops, including options for low ceilings, long benches, and larger work areas. We’ll look at brightness, efficiency, installation, durability, and useful features such as linking or motion sensing. Specifications help, but they do not tell the whole story. A fixture may look excellent on paper and still create distracting glare over a polished surface. I’ve learned that the hard way. Use the comparisons as a starting point, then match the light to your room, your tasks, and your budget. A little unevenness in coverage can remain, even with a careful choice. That deserves a second look.
Top 10 Best Shop Lights for Garages and Workshops

How Garage Shop Lights Are Classified by Lumens, Wattage, and Mounting

Top 10 Best Shop Lights for Garages and Workshops

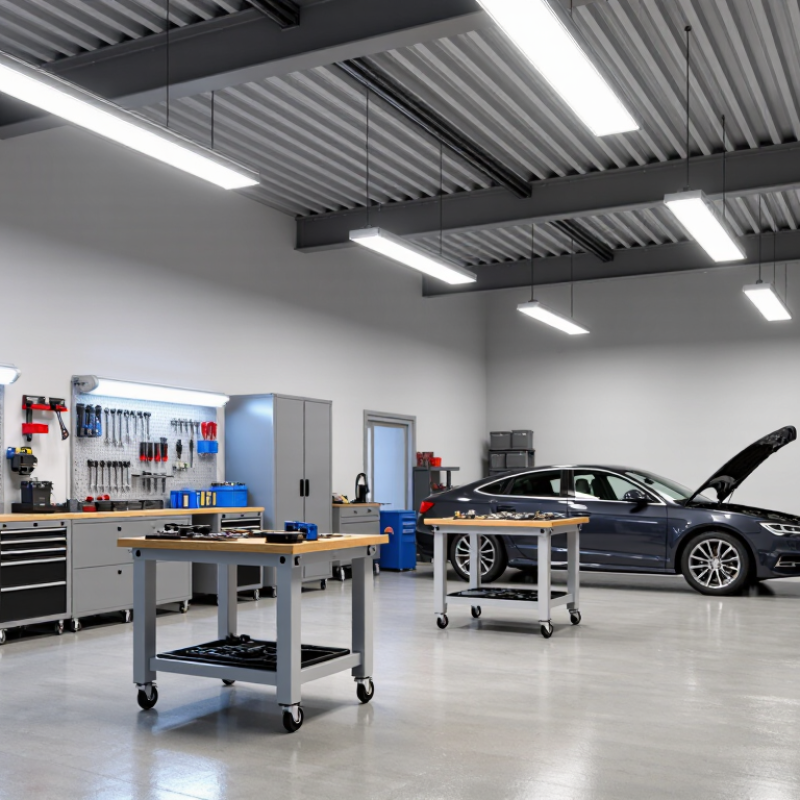
Shop-light choices become clearer when compared by light output, energy use, and installation style. Lumens describe visible light, while watts show electrical power consumed. They are related, but not interchangeable: two fixtures using similar wattage can produce different brightness. For a two-car garage, consider room size, ceiling height, wall color, and the work you do. A bright central fixture may leave shadows under a workbench; several evenly spaced lights often spread illumination more evenly. Check lumen ratings and beam pattern, not wattage alone.

Mounting changes how useful those lumens feel. Surface-mounted fixtures suit low ceilings and existing boxes, while suspended lights can hang closer to benches beneath taller ceilings. Linkable fixtures may simplify a long row, but connectors and cords can look untidy. Installation details matter. Dust, moisture, and vibration can also affect your choice; check the fixture’s rating and installation instructions. Real garages rarely match showroom layouts, so leave room for doors, shelves, and vehicles.

Tips: Sketch the work area and mark benches before choosing fixtures. Compare total lumens, watts, and coverage together. If possible, test one light at night; a specification sheet cannot reveal every shadow. Measure ceiling height twice. Perfect spacing is not always practical.

Which Specs Matter: 80+ CRI, 4000–5000 K, and LED Efficacy

For garage lighting, the specifications on the box can matter more than a large lumen number.

A color rendering index (CRI) of 80 or higher helps reveal wire colors, paint shades, and surface flaws accurately. For detailed repairs, higher CRI can be useful, though it does not fix poor placement. It matters.

A color temperature between 4000 and 5000 kelvin usually gives a clear, neutral appearance without the bluish cast some people find tiring. Choose based on the work and your preference; labels cannot predict how a room will feel.

Check efficacy, listed as lumens per watt, to compare how efficiently a fixture turns electricity into light. Higher efficacy can reduce energy use for similar light output, but it is not the whole story. Not always.

Look for even coverage, low glare, and suitable brightness at the work surface. A bright fixture that leaves dark bench corners may disappoint. In a long garage, spacing several fixtures often works better than relying on one intense light. I would also check for flicker information and whether the fixture suits the ceiling height. These details are easy to overlook when shopping.

How to Plan Workshop Lighting Around 50–100 Foot-Candles

Top 10 Best Shop Lights for Garages and Workshops

Plan lighting around the work, not just the room’s square footage. A practical starting range is 50–100 foot-candles at the work surface. Aim near 50 for general assembly and storage tasks; consider closer to 100 for fine repair, reading measurements, or inspecting small parts. These are planning targets, not guarantees. Your eyesight, surface finish, and task details matter.

Place fixtures so light reaches benches from more than one direction. A single bright row can leave your hands casting shadows across a vise or drawing. Over a long bench, use evenly spaced fixtures, then check the corners and the floor between work areas. Dark cabinets and unfinished walls absorb light. Pale surfaces often help spread it.

Measure at bench height, with a light meter if available, rather than relying on the fixture’s advertised output. Check several points, including beneath shelves and near the garage door. Adjust placement before adding more fixtures. I would not assume one measurement tells the whole story; daylight and open doors can change readings. Stand where you usually work, switch on the lights, and inspect a small screw or pencil mark. If details still disappear, the lighting plan needs another pass.

Top 10 Best Shop Lights for Garages and Workshops — How to Plan Workshop Lighting Around 50–100 Foot-Candles

Unbranded comparison of common shop-light types. Representative specifications are examples, not guaranteed ratings for every fixture in a category.

Rank Shop Light Type Representative Input Light Output Efficacy Common Color Quality Estimated Area per Fixture at 50–100 fc Typical Mounting Context Best Suited For
1 4-ft LED linkable strip light 40 W 4,800 lm 120 lm/W 4000–5000 K; commonly CRI 80+ 23–46 sq ft Ceiling or suspended mounting; typical residential garage height General-purpose lighting in home garages and small work areas
2 4-ft LED wraparound fixture 40 W 4,000 lm 100 lm/W 4000–5000 K; commonly CRI 80+ 19–38 sq ft Surface-mounted on a ceiling Garages where a broad, enclosed ceiling fixture is preferred
3 4-ft integrated LED utility light 50 W 5,000 lm 100 lm/W 4000–5000 K; commonly CRI 80+ 24–48 sq ft Ceiling-mounted or suspended, depending on fixture design Everyday garage lighting and general workshop tasks
4 8-ft LED strip light 80 W 10,000 lm 125 lm/W 4000–5000 K; commonly CRI 80+ 48–96 sq ft Ceiling or suspended mounting in larger rooms Long work areas and open workshops needing fewer fixture rows
5 UFO LED high-bay light 150 W 22,500 lm 150 lm/W Commonly 4000–5000 K; CRI often 80+ 108–216 sq ft Suspended in taller spaces, often around 15–30 ft mounting height High-ceiling workshops, barns, and larger work bays
6 Linear LED high-bay light 150 W 21,000 lm 140 lm/W Commonly 4000–5000 K; CRI often 80+ 101–202 sq ft Suspended from a high ceiling, often in rows Long production benches, vehicle bays, and taller workshops
7 4-ft vapor-tight LED fixture 45 W 5,400 lm 120 lm/W 4000–5000 K; commonly CRI 80+ 26–52 sq ft Surface-mounted or suspended; sealed housing varies by fixture Dusty or damp work areas when the fixture has an appropriate rating
8 Portable LED tripod work light 50 W 5,000 lm 100 lm/W Commonly 4000–5000 K; CRI varies by model 24–48 sq ft Portable floor stand; aim toward the task area Temporary projects, vehicle repairs, and movable task lighting
9 Under-shelf LED bench light 20 W 2,000 lm 100 lm/W Commonly 4000–5000 K; CRI varies by model 10–19 sq ft Mounted under a shelf or cabinet above a workbench Supplemental light for close-up bench tasks
10 Adjustable LED task light 12 W 1,000 lm 83 lm/W Color temperature and CRI vary by fixture 5–10 sq ft Desk, clamp, or articulated-arm mounting near the task Focused work such as assembly, inspection, or detailing

Planning note: Estimated area is calculated from fixture lumens using a simplified 0.48 maintenance-and-utilization factor (0.60 utilization × 0.80 light-loss factor), then divided by 50–100 foot-candles. Actual illuminance depends on room dimensions, ceiling height, fixture spacing, reflectance, lens distribution, dirt, and obstructions. Use a lighting layout or on-site measurements to confirm uniformity and task-plane levels.

Top 10 Shop Lights Compared by Output, Energy Use, and IP Rating

A useful top-10 comparison starts with delivered lumens, not wattage alone. Lumens show how much visible light reaches the work area; lumens per watt reveal energy efficiency. ENERGY STAR reports that certified LED lighting uses at least 75% less energy than incandescent lighting, a helpful benchmark rather than a direct comparison between shop lights. For a bench with small screws or detailed wiring, compare measured brightness and beam coverage, not just the biggest number on the box. More light is not always better; glare can make a bright fixture tiring.

Check each light’s IP rating against the garage’s real conditions. Under IEC 60529, IP54 indicates protection from limited dust ingress and splashing water, while IP65 is dust-tight and protected against water jets. A dry, insulated workshop may not need the same protection as a damp garage near a sink. Compare rated lumens, watts, and IP code together, and look for test details. A claimed output can be difficult to verify without independent measurements.

Tips: Measure the bench and ceiling height before choosing fixtures. Compare lumens per watt, then check whether the beam leaves dark corners. ENERGY STAR’s energy figures describe LEDs broadly, not every shop-light model. That distinction matters. I would treat unusually high output claims cautiously; product listings do not always explain how they were tested.

How to Install and Maintain Lights for Safe, Even Coverage

Even coverage begins with a quick sketch of the garage or workshop. Mark benches, shelves, doors, and any ceiling beams that could block light. Place fixtures over work areas, not just along the room’s edges. A single bright strip can still leave deep shadows beneath cabinets. Check the shadows.

Before drilling, turn off power at the breaker and confirm the circuit is not live. Follow the fixture instructions and use mounting hardware suited to the ceiling material. Secure each light firmly, and keep cords away from sharp edges, heat, and moving equipment. If wiring is unfamiliar or the installation needs new electrical connections, ask a qualified electrician. Good lighting should never depend on a loose plug or improvised support.

Switch on the lights and inspect the space from the workbench, not only from the doorway. Look for glare on metal surfaces and dim corners near tool storage. A common layout mistake is spacing fixtures evenly across the ceiling while ignoring where hands and tools cast shadows. Adjust positions or add a task light where careful work happens. Dust the lenses periodically with a dry or slightly damp cloth, following the manufacturer’s care guidance. Check mounts, plugs, and cords for looseness or wear; replace damaged parts rather than patching them. After rearranging shelves, review the light pattern again.

Practical Light Levels for Garages and Workshops

Typical target illuminance by work area, measured on the relevant floor or work surface.

These are practical planning targets, not universal requirements. Actual needs depend on the task, surface, and user. Combine general lighting with focused task lights, and aim for even coverage with minimal glare and shadows.